So I have this new iPhone X, and I like it so far. I’m sure I’ll have much to write about it in the coming months. But first, as with any new iPhone, there is one stage of the upgrade process I always dread, and that’s getting my iTunes music library copied over to the new device.
I know I’m in the minority here, but I like having all my music on my phone. And I mean downloaded, ready to play, regardless of network connectivity. I ride the subway a lot, and thus I often find myself in a position of no internet connectivity. And I like to decide what I want to listen to in the moment, not ahead of time. It’s very frustrating for me to be in the mood for a song, go to play it on my phone, and nothing happens.
Remember with the iPod, the promise of having all your music in your pocket? That’s all I want. Seems to me that in 2017 I should be able to have what I already had in the early 2000s, right?
You would think this would be easy, copying my entire library, since all my music is on my Mac, and thus a simple USB cable would be all I'd need to copy all that music over to my new phone. If you think this is true, you clearly haven’t been reading my blog for very long. For several years now, as Apple has ignored users in my situation, the process of getting my songs onto my phone has resulted in doubled tracks, missing tracks, incorrect album artwork, songs that simply never copy, songs that appear to be on the phone but refuse to play, and on and on. It has been a nightmare for a geek like me who makes an effort to have a very orderly library and who likes to listen to entire albums. And I have been very vocal about it.
If your library isn’t that large, if every song was purchased via the iTunes Music Store, or if you just don’t care if you have to stream songs, you may not relate to any of my issues here. If you shuffle songs in your library, perhaps you aren’t even aware that several of your tunes are duplicated or missing. But if you have lots of tracks that you ripped from CDs back in the Stone Age, or you purchase songs from places other than iTunes occasionally, and you haven’t yet surrendered your entire music flow to streaming services, you may be experiencing many of the difficulties I have with iTunes over the past five or more years. If so, read on. I think I may have finally discovered a full-proof method for getting a clean copy of all my songs in relatively few steps.
The reason this is finally working for me, I think, is that a recent update to iTunes seems to have at least solved one of the biggest issues I had with file transfer. Dragging songs from the Mac’s library over to the iOS device has actually become a lot more reliable in the most recent updates to iTunes. At least for me. (Whoever it was that fixed this at Apple, thank you.) In previous versions, this was anything but reliable. Often, nothing would happen when you drag. Or, iTunes would tell you it was copying, but nothing would actually copy. Or, you’d get a “ghost” track on your iPhone—a dimmed version that would show up in iTunes when you plugged the phone in, but not in the Music app on the phone.
Other parts of the iTunes workflow, like doing an automatic sync, finding phantom songs listed, etc. are still as bonkers as ever. But at least now when I drag a file, I find that it actually does copy to the iOS device on the first try more often than not. This is a huge improvement.
So given this discovery, after a few false starts this year, I decided on a new workflow for getting my entire library copied. And to my surprise, with a few tweaks, it actually works.
Get the biggest iPhone storage capacity you can afford
First and foremost, when you are purchasing your new phone, you’ll want one with as much free space as possible to accommodate your library. Fortunately for me, Apple a few years ago upped the largest storage capacity on iPhones to 256GB, which is finally enough to hold my whole catalog with room to spare. Prior to this, I needed to pick and choose which songs I wanted to have with me, which added some extra complications and headaches.
You may find that the base 64GB models are enough to hold all your songs. Depends on how much music you have. Just make sure you account for all the space also taken by apps, photos, etc. You don’t want your phone to be on the edge of full because of your music library—or for any reason, really.
Clear all music out of your phone
When you restore from a backup during the setup process, your iPhone will not only restore all your settings and apps; it will also start downloading music. Not all your music. Just whatever songs were on your previous phone that happened to be purchased in the iTunes Music Store. This will likely leave you with a weird mix of some tracks from your entire library. If you have iTunes Match or Apple Music, the restore may also attempt to grab your other tracks, but I’ve found this completely unreliable.
Basically, you have no idea what you’ll actually get from a restore, so it’s best to remove everything and start over from scratch.
Unfortunately, there doesn’t seem to be a way to tell the setup assistant to just ignore your music. You have to wait until it thinks it’s downloaded everything it was supposed to. Otherwise, it will keep trying. This usually takes the better part of a day for me, so be patient. There is a cancel all downloads button in the Music app you can try, but that may or may not work. The bottom line: don’t expect to listen to music on day one of your new iPhone. (Great new device experience there, Apple.) What I do instead is just let it try to download whatever it wants overnight and start the actual process of getting my music copied over the next day.
There are a few different ways to clear out all your music on your phone. What I like to do is plug the phone into my Mac, fire up iTunes, and delete everything from there. Click on the iPhone icon that appears at the top left a few seconds after plugging in your phone, next to the category dropdown menu.

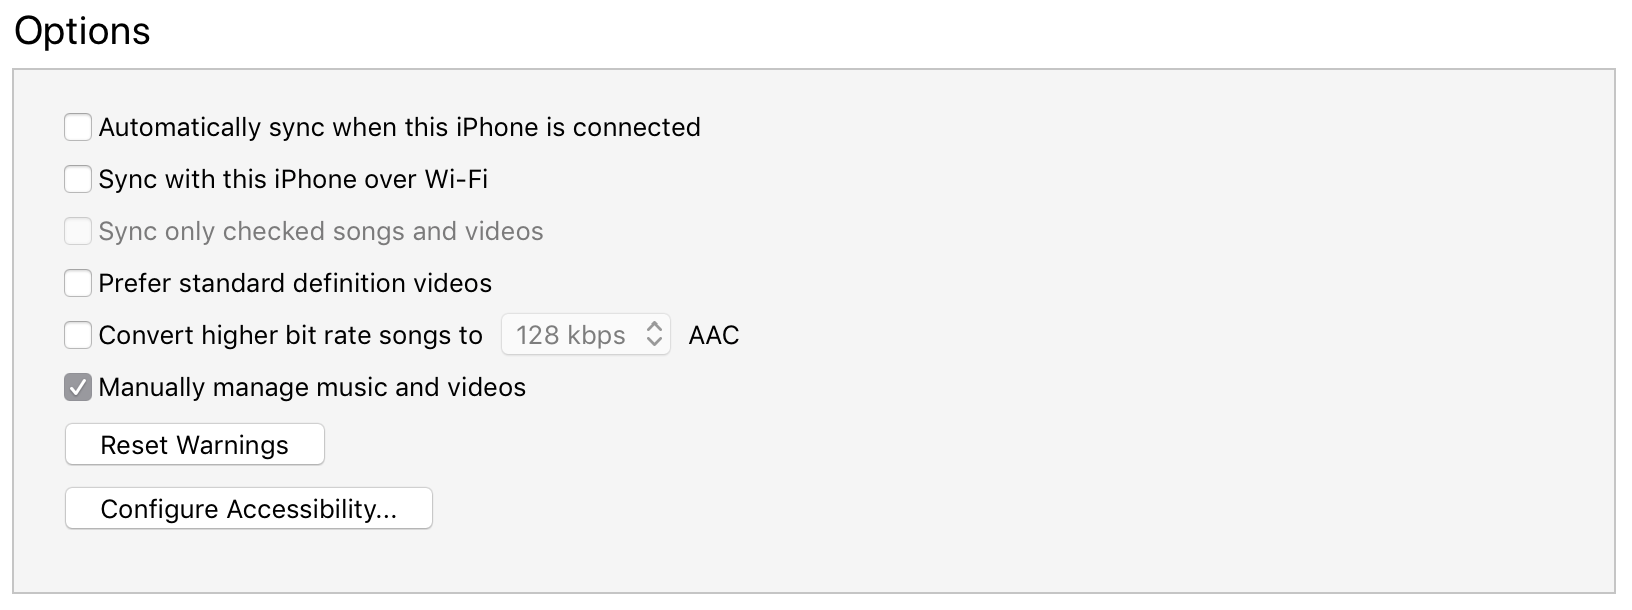
On the left sidebar, under Settings, click on Summary. In the main window, in the Options section, be sure to check “Manually manage music and videos.”
On the left sidebar again, under On My Device, click on Music. This will show you a listing of every song currently on your iPhone. Select all the songs, then delete. Be sure there is absolutely nothing left listed after the delete.
At this point, you probably still have music on your iPhone. I did. Unplug the iPhone, open up the Music app, and verify that all the songs are gone. If you still see music listed there, be sure to delete any of the remaining songs. You have to be 100% certain that all the songs are gone, or you will very likely end up with duplicates in the end.
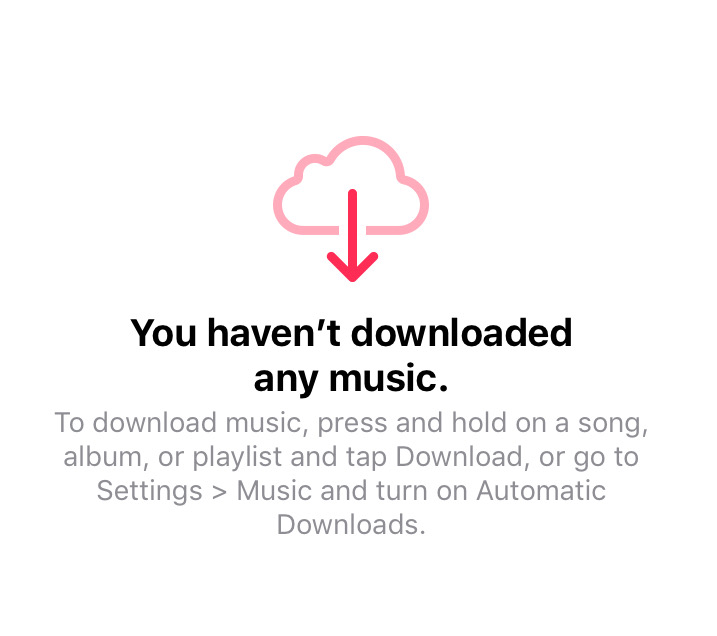
When all the music is truly gone from your iPhone, and you are in the Downloaded Music section, the music app should show a blank page that reads “You haven’t downloaded any music.” It’ll have a big download cloud icon. That’s how you know it’s all truly gone.
Because you still shouldn’t trust that it’s all truly gone, restart your phone. Open the Music app again, and check it again. iOS has a tendency to leave some stragglers, believe me. It’s worth as many checks as you can stomach.
Once you’re sure you have cleaned out your entire library, plug the phone back into iTunes. You are now ready to actually copy your library.
Copy your songs from iTunes onto the phone
There are lots of ways to copy your songs over, but in my experience there’s only one way that works reliably. (At least it does now. This would not have been true in earlier versions of iTunes.) For me, all the auto-syncing methods are unreliable. I tried again this year, resulting in multiple issues. What works best for me, thanks to that most recent iTunes update, is good old-fashioned drag and drop.
First, verify that the library is still indeed empty by clicking on the iPhone icon again. (I know, you think I’m nuts at this point, but I bet some of you still have a few songs showing on that list. If so, delete them again.) Once you are sure you are empty, click the back button to get back to your music library. Click on songs in the sidebar. Be sure you have all genres, artists, and albums showing in the list. Select all, and drag the songs over to your iPhone in the sidebar, under devices. A blue outline will surround the iPhone area. Drop. The songs should start copying. Depending on the size of your library, it may take a while for the copy to complete. (Maybe even hours.) Let it complete. Do not get impatient and unplug the phone. Don’t cancel. Don’t open the Music app on your phone. (It will likely crash if you do.) Let it work itself all the way through, even if you get the dreaded “Waiting for items to copy” message for several minutes. Eventually, the copy should complete, and you should now have your entire library on the phone, hopefully with no duplicates, incorrect artwork, missing songs, or corrupted songs.
You can optionally drag albums or artists one at a time. Pick and choose what you want to copy. This is what I used to do when drag and drop was less reliable. I’d do one artist at a time. Check to see all the tracks were actually there. Delete and start again if they weren’t. Etc.
This time, I found that there were only a few artists/tracks that I didn’t actually want on my phone, so I just copied everything in one drag; then, once the copy had completed, I clicked on the iPhone icon again and deleted the few tracks I didn’t want.
And that, hopefully, will get you your entire music library onto your shiny new phone with the least amount of hassle. So far, I haven’t found any corrupt files, duplicates, or missing tunes. Only time will tell, I suppose, as I actually listen to a lot of these tracks. But all indications so far are that this worked for me.
I hope that helps some of you get your music into your pocket. Compared to years past, this time around was far smoother, thanks to this new workflow. Last year, it was weeks before I was sure I had the bulk of my tracks loaded properly onto my phone. And even then I was never fully sure what I’d get when I chose to listen to an album I hadn’t tried yet.
In a perfect world, Apple would make this process even easier by giving me the option to leave music out of the restore entirely. Perhaps next time I’ll try deleting all my music and doing a backup on my old phone before restoring it to the new one to see if that helps. Or I’ll be quicker with the Cancel All Downloads button to see if I can get that to actually stop the automatic downloads after restore. Meanwhile, I’m happy that this time around I seem to be able to listen to whatever I want reliably in such a short time.